



You might have heard that there’s a new promising player on the controller market. Leadjoy – a company founded by industry veterans, so expectations for their first controller, the Xeno Plus, are pretty high. Naturally, the main question is whether it can actually live up to all the excitement around it or whether it is just another ambitious newcomer with big claims? After spending some time with it, I think I have a pretty clear answer.
Main Features and Specifications
Notable Features:
- Top-tier JS13 Pro TMR Sticks
- Thumbsticks with Removable Rubber Caps
- Enlarged ABXY Buttons
- Supports Leadjoy Magic Key System
Brief technical specifications:
Specifications are based on official information and expanded with data from my own testing and observations.
- Sticks Layout: Asymmetrical
- Button Layout: Xbox Style
- Sticks Type: TMR (JS13 Pro)
- Triggers: Hall Effect, with Microswitch Trigger Stops
- ABXY Buttons: Mechanical Microswitches
- D-Pad Buttons: Tactile Microswitches
- Extra Buttons: 4 Back Buttons + “С” Button on the Front
- Vibration: Dual Asymmetric Rumble Motors
- Gyroscope: 6-Axis Native and Simulated Gyro
- Software: Mobile App + PC Software
- Macro/Turbo: Supported
- Compatibility: PC, Switch 1/2, Android, iOS
- Connectivity: Wired, 2.4 GHz, Bluetooth
- Polling rate:
- Wired – 1000Hz
- 2.4GHz – 1000Hz
- Bluetooth – 125Hz
- Battery: 1000 mAh
- Weight: ~ 234g
- Extras: 3 Onboard Profiles (Can Function As Shift Layers), Dual Connection Feature
- Price: $59.99
Available colors:
- Black
Unboxing: What’s Inside?

Inside the box you’ll find:
- Xeno Plus controller
- Charging dock
- Interchangeable cross-style D-pad
- 2.4 GHz wireless dongle (R10)
- USB-A to USB-C cable
- Manual
- QC card
- Support card
Including a charging dock in the box feels like a thoughtful touch and something I always welcome. It makes the whole package feel more complete. I also have to mention how stylish the 2.4 GHz dongle looks. It’s a small detail, but I really liked the design – it doesn’t feel like some generic dongle thrown in, but something that actually matches the overall product vibe. And while the included cable isn’t braided, it’s not just a random generic one either. It feels solid, and even comes with Leadjoy branding.

Even though the package only includes the most essential items, those little touches – like the branded cable or the sleek dongle – highlight the attention to detail right from the start and show that Leadjoy is taking things seriously.
Feel & Look
The controller feels solid and well-built, and the plastic doesn’t feel cheap at all. The grips aren’t rubberized, but they do feature a laser-etched texture. Personally, I’m not a big fan of rubberized grips anyway, so this approach works quite well for me. However, the texture is very subtle, and you barely feel it under your palms.
The controller weighs 234 grams, which makes it pretty lightweight. In terms of size, it’s slightly smaller than an Xbox controller. It also reminds me a bit of the G7 Pro, but a little thinner overall. I think it should fit small to medium hands really well. I have medium-sized hands myself, and it felt comfortable to use.

Visually, it comes in a black colorway with purple and grey accents. I also really liked its retro pixel-style theme – it gives the whole controller a bit of personality. The Home button features a pixel smiley face, which is a nice touch. The ABXY, C, and system buttons all feature legends in a pixel-style design, and even the thumbstick rubber caps come with a small pixel smiley on them. When the controller is powered on, the Leadjoy logo lights up, also designed in a pixel-style lettering. It can light up in different colors, indicating things like the active connection mode, active on-board profile, battery status etc.

On the front, you get the standard set of buttons, along with Fn and C buttons. The Fn button also has a built-in LED indicator. On the back of the controller, there are four extra buttons, a pairing button, trigger mode toggles, and a product information label. Interestingly, it also includes shortcuts for different connection modes, which is actually quite convenient. But while it’s useful, some people might still prefer a cleaner-looking back panel.

Analog Sticks
To me, the analog sticks are easily the most interesting part of this controller. The Leadjoy Xeno Plus uses TMR sticks – specifically the JS13 Pro modules paired with a 12-bit ADC with a maximum resolution of 4096 steps. Those sticks are widely considered some of the best on the market right now, if not the best. And honestly, they live up to that reputation. They feel genuinely impressive in use – smooth, responsive, and very precise. But the most defining feature of the JS13 Pro is its excellent linearity. The sticks feel very well-tuned overall, and using them is just genuinely enjoyable. I didnt notice any jitter, input delays, axis snapping, or other odd behavior.
In terms of feel, the stick tension is fairly standard, somewhere around 60 grams, which strikes a nice balance between control and comfort. Both LS and RS clicks have a moderate actuation force without being too light or too heavy. There’s practically no wobble in the center, and sticks re-center very consistently after release. Even with zero dead zones, the drift in the center position is very minimal, which is impressive.
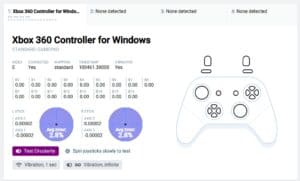
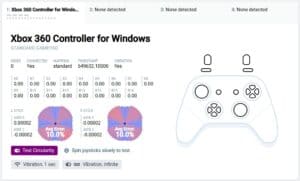
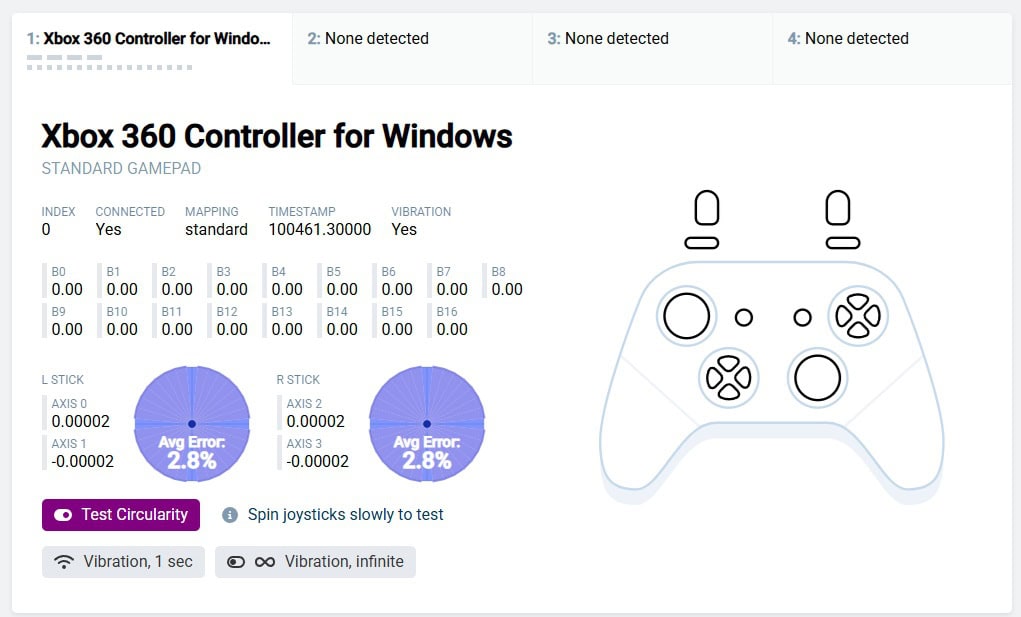
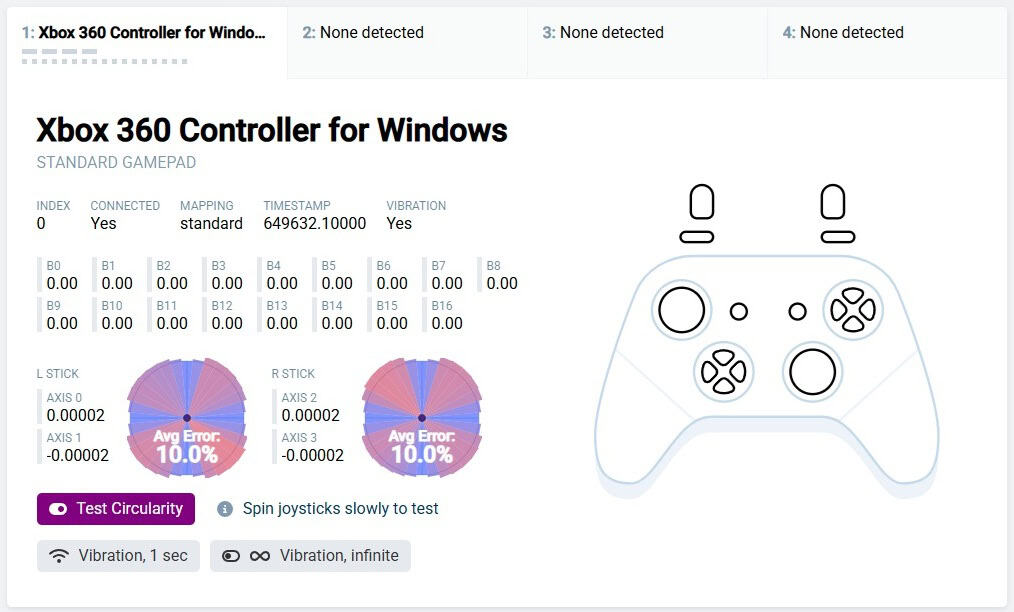
In testing, the average circularity error was around 2.8% in circle mode and about 10% in square mode. That kind of result in circle mode suggests the controller isn’t relying on aggressive software filtering to artificially improve the numbers – and that’s actually a good thing.
The thumbsticks have metal rings on the shafts, which makes the movement quite smooth. They are compatible with PS-style KontrolFreek’s / thumb grips. Although they are interchangeable, there are no spare thumbsticks included in the box. However, Leadjoy does offer two different “Magic Cap” kits for purchase, which include, among other things, taller thumbsticks.
The rubber caps on thumbsticks deserve a separate mention. First of all, they are extremely grippy and very pleasant to the touch, although they do tend to attract dirt a bit more easily. The main feature here, however, is that the rubber caps are removable. Yes, the caps themselves can be taken off and replaced without changing the entire thumbstick shaft. Caps with different alternative shapes are included in those optional “Magic Cap” kits I mentioned earlier.
In my opinion, this is a brilliant design choice, because it makes wear and tear almost a non-issue – once the rubber on the cap wears out, you can simply replace it instead of swapping the entire thumbstick. It also opens the door for more customization options. You can mix and match different stick heights with different rubber cap shapes. For example, one Magic Cap kit includes two thumbstick shaft heights and three different cap shapes, giving you a total of six possible combinations.

I can already guess the question that comes to mind – can you install third-party thumb grips directly onto the plastic base instead of using the stock ones or those from Magic Cap kits? I had the same question as soon as I found out the rubber caps are removable. I tried three different thumb grips I had on hand (the ones on the right in the photo), and unfortunately it didn’t work – they don’t fit properly and just wobble. The plastic base is too small and thin for them. Most thumb grips are designed to go over standard thumbstick caps and not to replace them.
This feels like a missed opportunity, in my opinion. If the plastic bases were made larger, they would become compatible with aftermarket thumb grips. It would add a whole new layer of customization. Still, you can easily put third-party thumb grips over the rubber caps themselves like usual.
D-pad
The D-pad here is built on tactile microswitches and utilizes a central pivot design that prevents opposite directions from being triggered at the same time.

The presses has a bit of pre-travel, but nothing out of the ordinary. The actuation force sits around a medium level – maybe just slightly on the heavier side, though only by a small margin. Thanks to the tactile microswitches, each press feels crisp and satisfying. Diagonal inputs are easy to perform with no missed inputs. Quarter-circle and half-circle motions also feel reliable and didn’t cause me any issues.
In the box, you get two interchangeable D-pad caps – a classic cross style and a hybrid disc. Personally, I really enjoy the hybrid disc compared to the Xbox-style faceted disc. It provides a clear sense of the main directions, while still making it noticeably easier to hit diagonals when I need them. That combination makes it feel versatile and comfortable for me to use.

ABXY
Probably, the first thing you notice when looking at the controller is the enlarged ABXY buttons. At first, this might feel a bit unusual, but I got used to it within just an hour or two. I actually think many people will end up liking this design, just like I did, since it feels quite comfortable, especially in fighting games.

The buttons are built with mechanical microswitches, and between the switch and the button itself there’s a silicone layer that makes presses feel more pleasant and tactile. There’s a bit of pre- and post-travel, but both are within the normal range.
The actuation force feels medium to me. I would also say the rebound is quite springy. The sound of the clicks is slightly muted. Of course, it is still a mechanical click, but not as loud as on some other controllers, which might be a plus depending on your preference.
System Buttons
The View, Screenshot, Menu, and Home buttons are membrane-based, while the “C” button and Fn button use tactile microswitches. The Fn button also has a built-in LED indicator, which is quite unusual.

The C button essentially acts as a fifth extra button, since on PC it doesn’t perform any fixed function and can be freely reassigned. I assume on Nintendo Switch it is supposed to be used for “GameChat” function. I set this button to switch between the on-board profiles, and it turned out to be really handy. Having a dedicated button for that makes the whole process much smoother, adding a lot of convenience when you want to quickly jump between different setups.
Shoulder Buttons & Triggers
The LB/RB buttons are built using tactile microswitches. They have a medium actuation force and minimal pre-travel. Response is consistent no matter where LB/RB are pressed. They feature a fairly aggressive textured surface, which provides excellent grip. The presses have a slightly muted sound and don’t feel hollow. The clicks itself are crisp and satisfying.

The triggers are based on 255-step Hall effect sensors. They feature the same dotted texture on the surface as the bumpers, although it is slightly less pronounced. In analog mode, they perform quite well, with no physical deadzone at the beginning of the travel. There is a very small deadzone at the very end, but it’s so minor that it’s almost unnoticeable. Linearity is excellent. The actuation force is slightly below medium. Unfortunately, there’s no damping at the end of the travel, so bottoming out with a hard press is quite loud.
The microswitch trigger mode is implemented at a very good level. In this mode, the triggers deliver a very pleasant and clearly defined click. There is some pre-travel, but it’s minimal. Overall, I was satisfied with it, and I really liked how well-defined and satisfying the click feels. In my opinion, this is a very solid implementation for FPS games.
Extra Buttons
Besides the “C” button, which I already mentioned earlier, the controller also has four extra back buttons arranged in a row, similar to the layout used on the Vader 4 Pro or HuBen 2. They feature the same aggressive textured surface as the bumpers, and it honestly feels fantastic under the fingers. I even found myself wanting to keep my fingers resting on them in games where I wasn’t actually using those buttons – definitely a plus in my book.

The two outer buttons use mechanical microswitches. They have a small amount of pre- and post-travel, and they deliver the same fast, very crisp, and satisfying click as the triggers in microswitch mode. The two smaller inner buttons, use tactile microswitches instead, and here the pre- and post-travel is practically non-existent.
Overall, the placement of the buttons feels ergonomic and very comfortable. I ended up more than satisfied with them.
The software also allows you to assign an additional four extra “buttons” to gyro movements. And it’s not limited to just controller buttons – you can map keyboard inputs or even macros as well. The ability to reload or swap weapons with a simple left or right flick turned out to be extremely convenient.
Haptics & Gyro
The Xeno Plus comes with dual asymmetric rumble motors with an instant stop feature, and I honestly didn’t expect the vibration to be the thing that would impress me so much in this controller. But the vibration here is genuinely excellent. It doesn’t come across as just a buzzing deep inside the controller, which is often the case, or a kind of unfocused vibration that shakes the whole controller and ends up being more distracting than pleasant. Instead, I get these well-balanced, controlled impulses directly into the palms. It’s hard to describe properly, but it feels genuinely enjoyable and well tuned.
The controller is equipped with a 6-axis gyro. On Nintendo Switch it works in native mode and delivers really strong results – it feels smooth, accurate, and fast, with no noticeable issues.
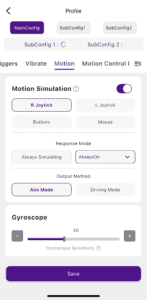
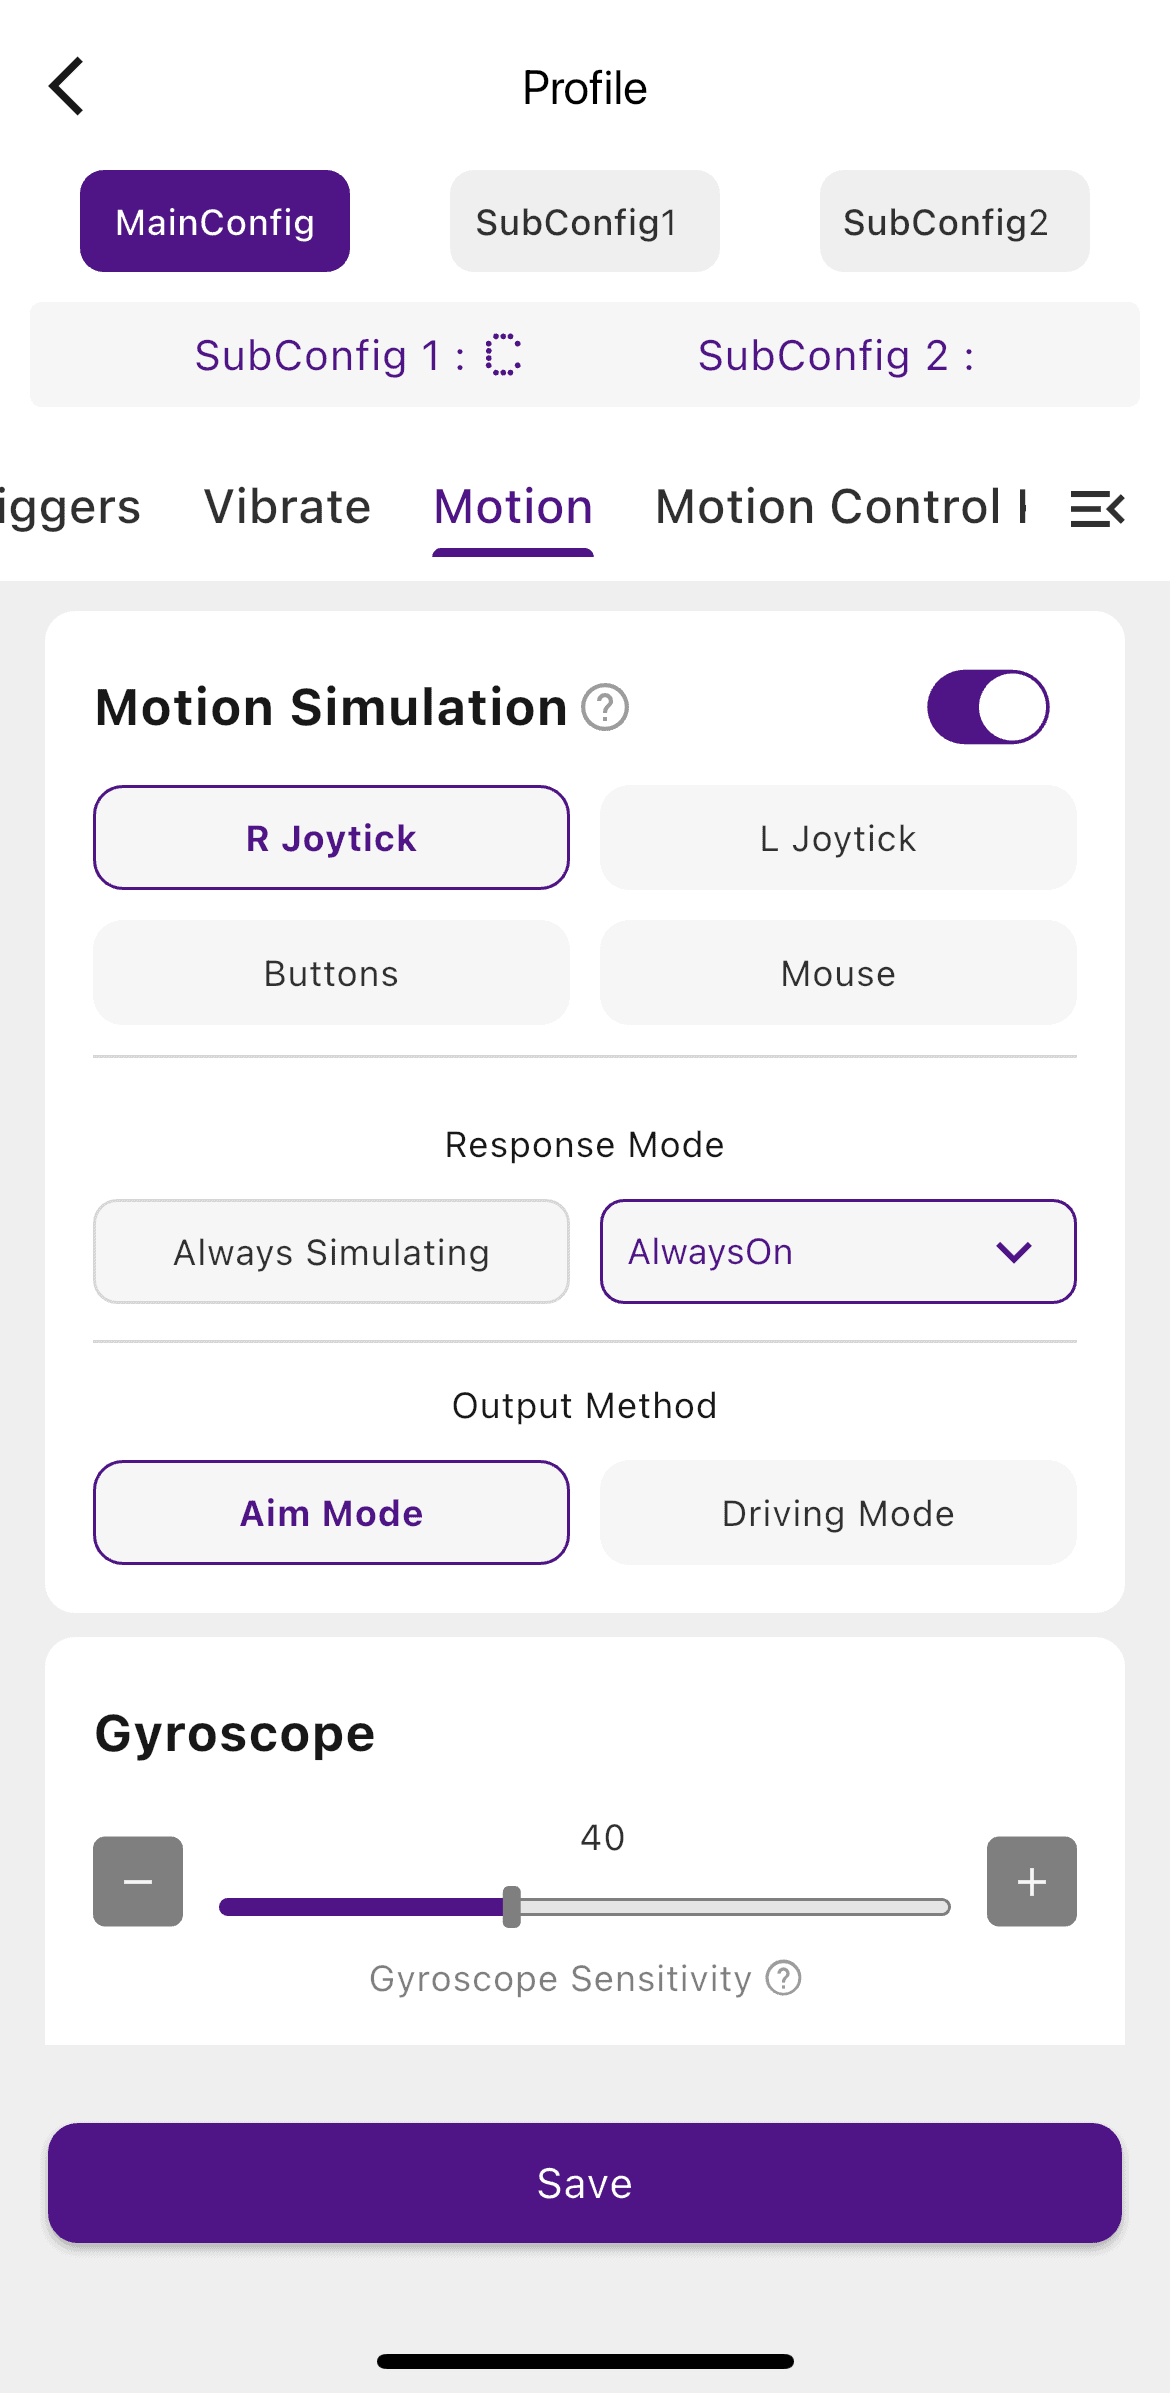
On PC, it works in a simulated mode, where it can be mapped either to the right or left stick. It can also act as four extra “buttons,” as I mentioned earlier, and it even supports mouse mode. I actually really enjoyed mouse mode and ended up using it quite a lot, even though I don’t consider myself a heavy gyro player. It simply works that well.
Interestingly, since the controller also supports mouse click mapping, you can effectively turn it into an air mouse on PC. For example, you can assign this functionality to one of the on-board profiles and freely switch to it whenever you need.
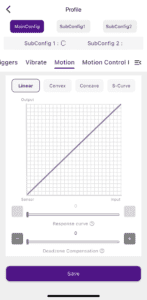
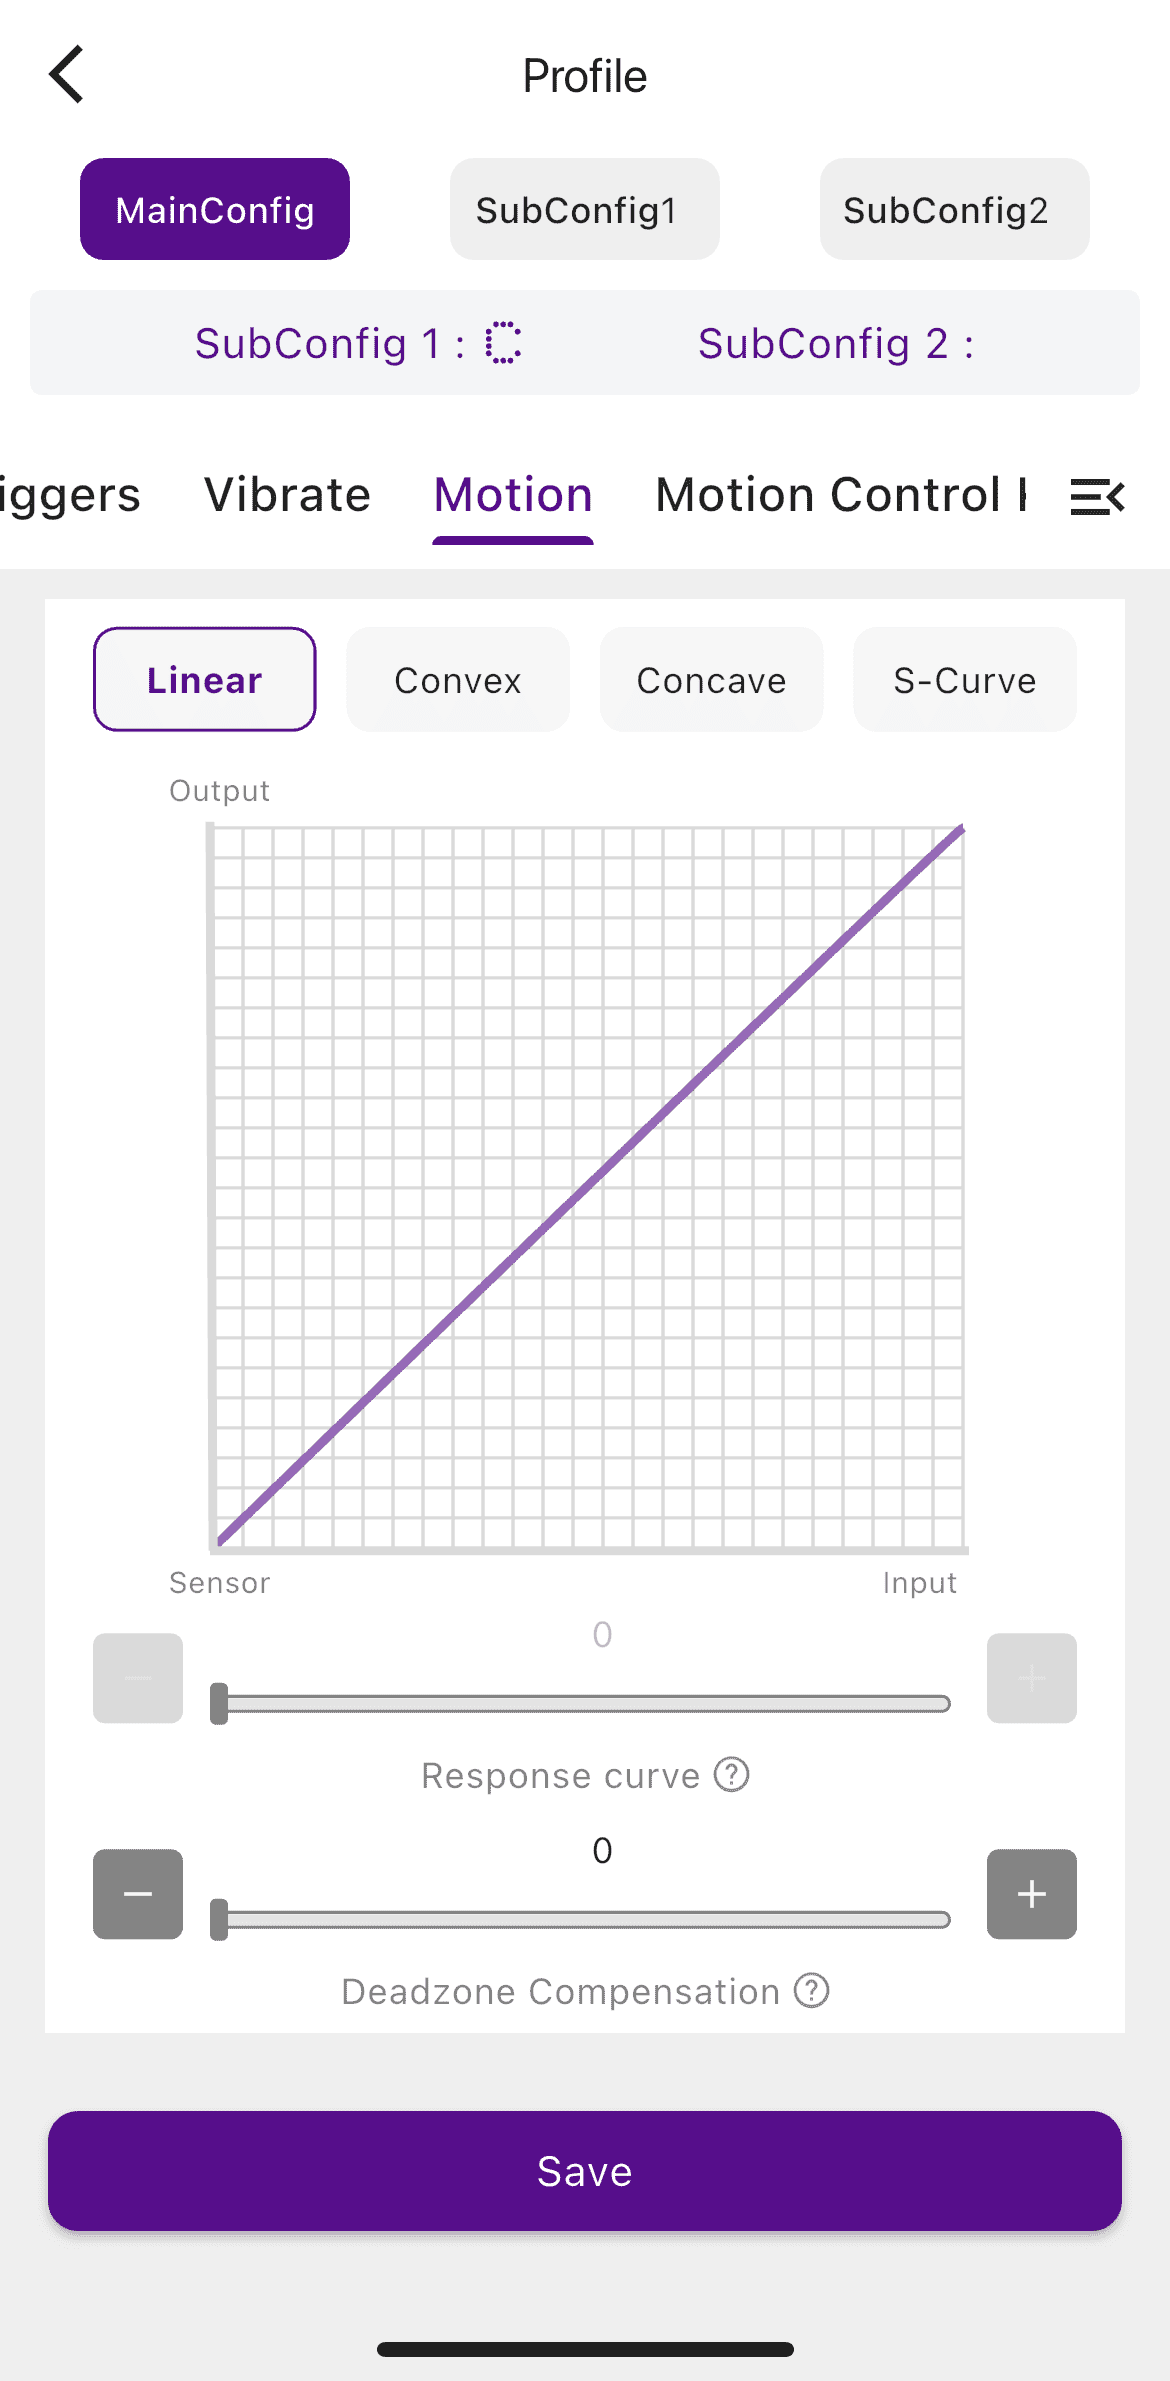
The software also offers a wide range of gyro-related settings, including different operating modes, sensitivity, dead zone compensation, and even response curve adjustments. Overall, the gyro implementation here is at a very high level, and I think players who rely on gyro will definitely be satisfied.
Connectivity & Compatibility
The controller features tri-mode connectivity, giving you the flexibility to switch between 2.4GHz, Bluetooth, or a wired connection. It works with PC, Nintendo Switch 1/2, Android, and iOS devices. On Nintendo systems, it can wake up the original Switch, but it can’t wake up the Switch 2.
It supports a very interesting feature called Dual Connection Mode. You can connect controller with both a wired connection and the 2.4GHz dongle simultaneously. This works either on a single device, giving you instant backup if one connection drops, or across two different devices.
Supported input modes:
- Wired:
- X-input
- D-input
- Switch
- DS4
- Bluetooth:
- X-input
- D-input
- Switch
- DS4
- 2.4 GHz dongle:
- X-input
- D-input
- Switch
- DS4
Software
The Xeno Plus comes with both a mobile app (iOS and Android) and dedicated software for Windows PCs. Having these options makes it easy to set everything up regardless of the device you’re using. The features are essentially the same across iOS and Android, but the PC software offers slightly more advanced functionality.
I tried the iOS app and the setup process was very straightforward. All you need to do is turn on Bluetooth, select the Xeno Plus model in the app, and press the pairing button (which actually just triggers a scan for a controller rather than a traditional pairing process – I assume this is just a translation nuance). Once your controller is found, you simply tap it to connect, and you’re done. It’s quick, simple, and doesn’t require any extra steps.
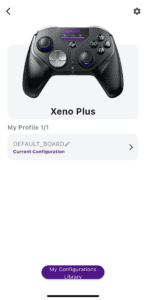
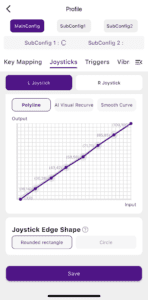
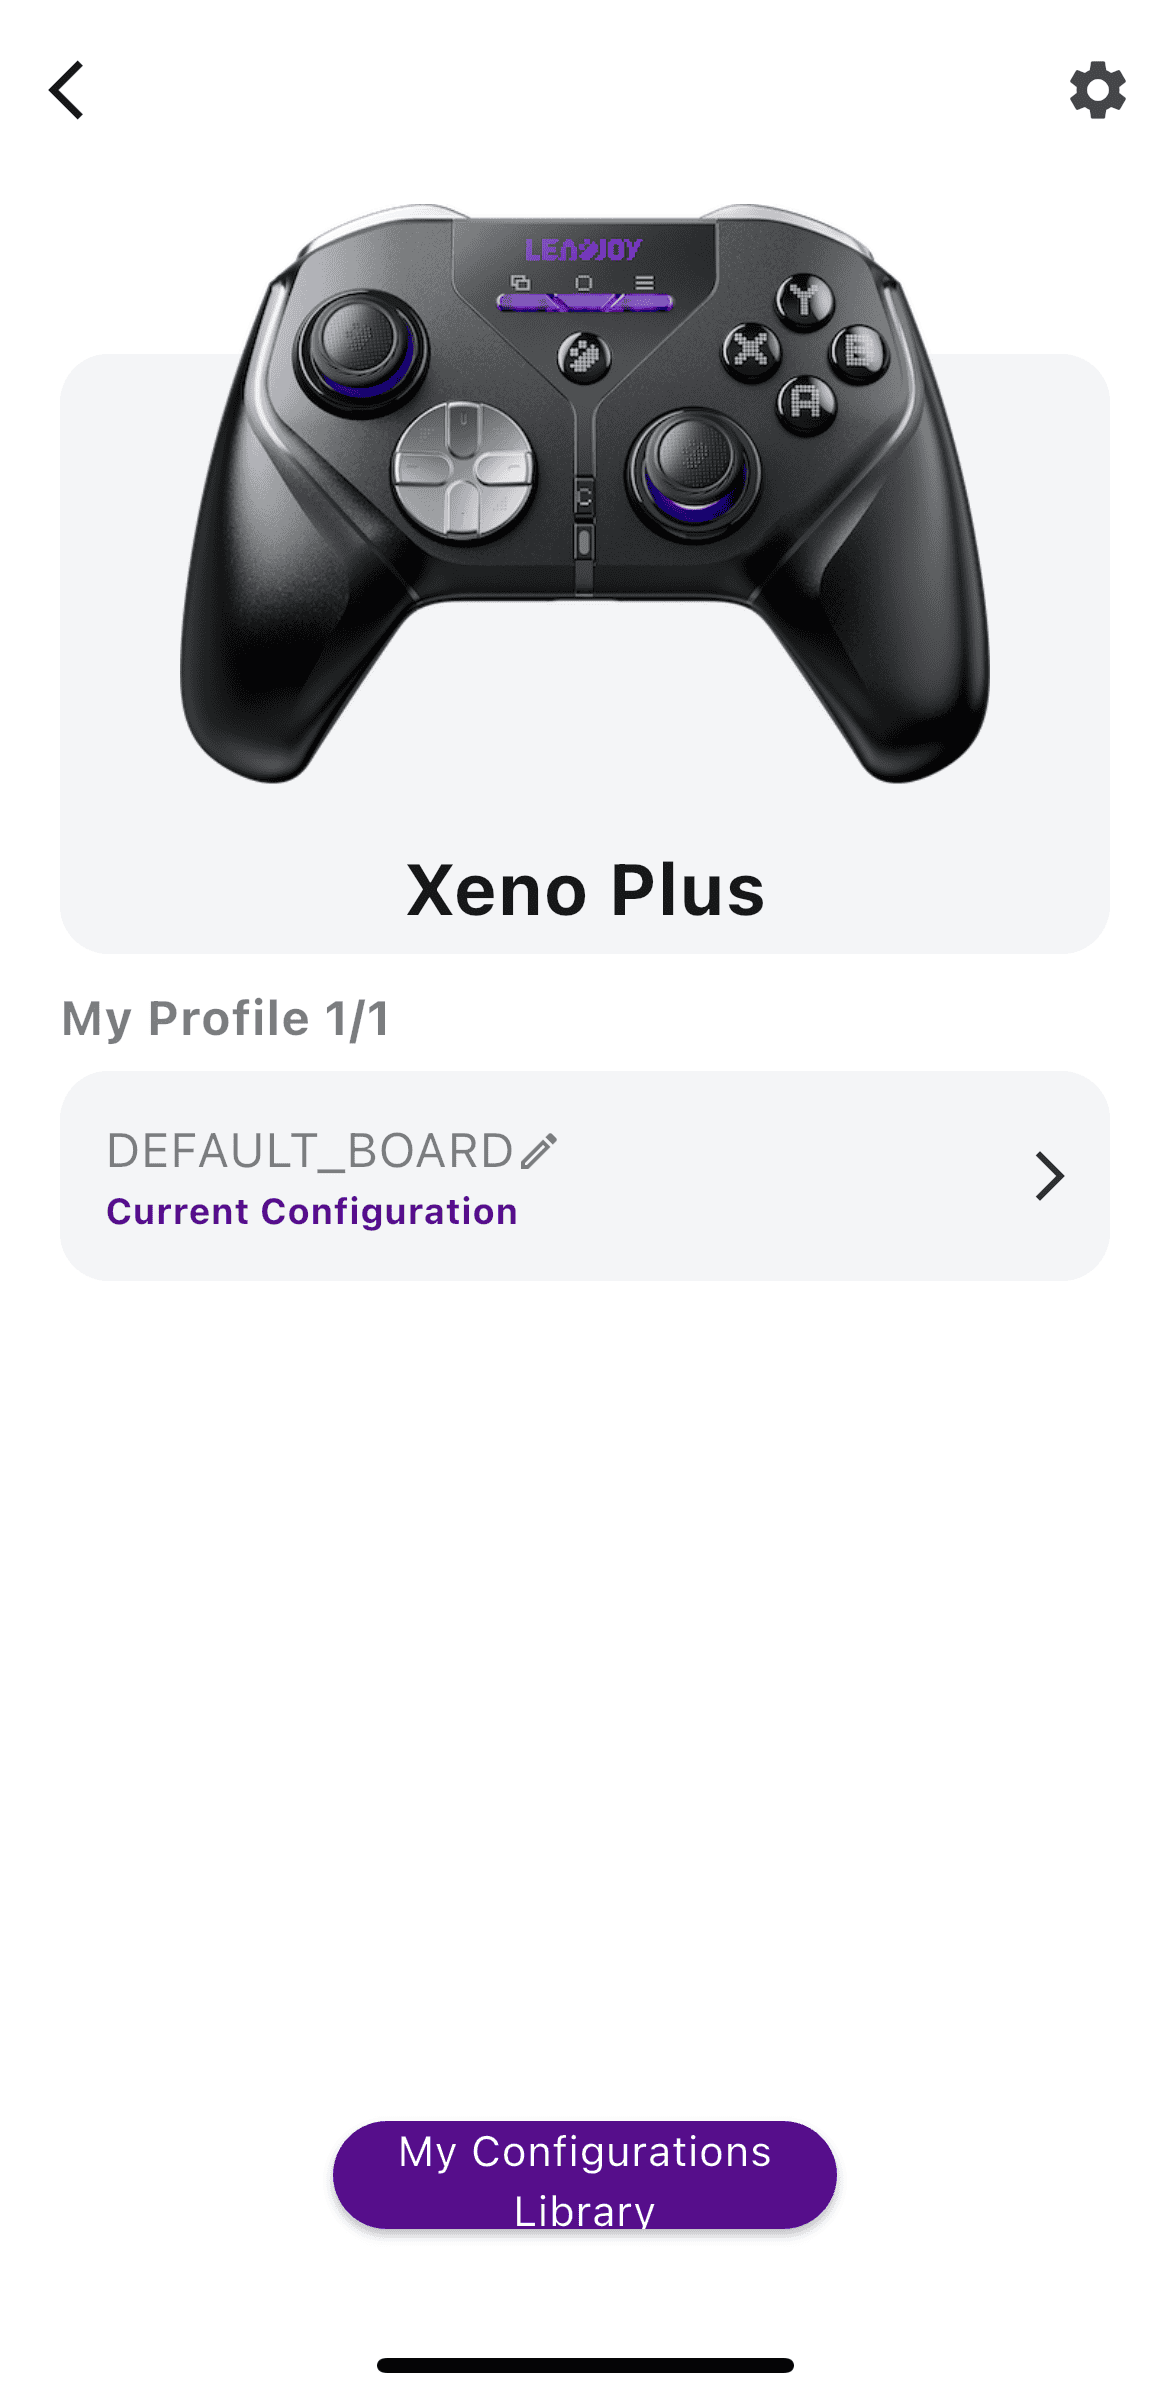
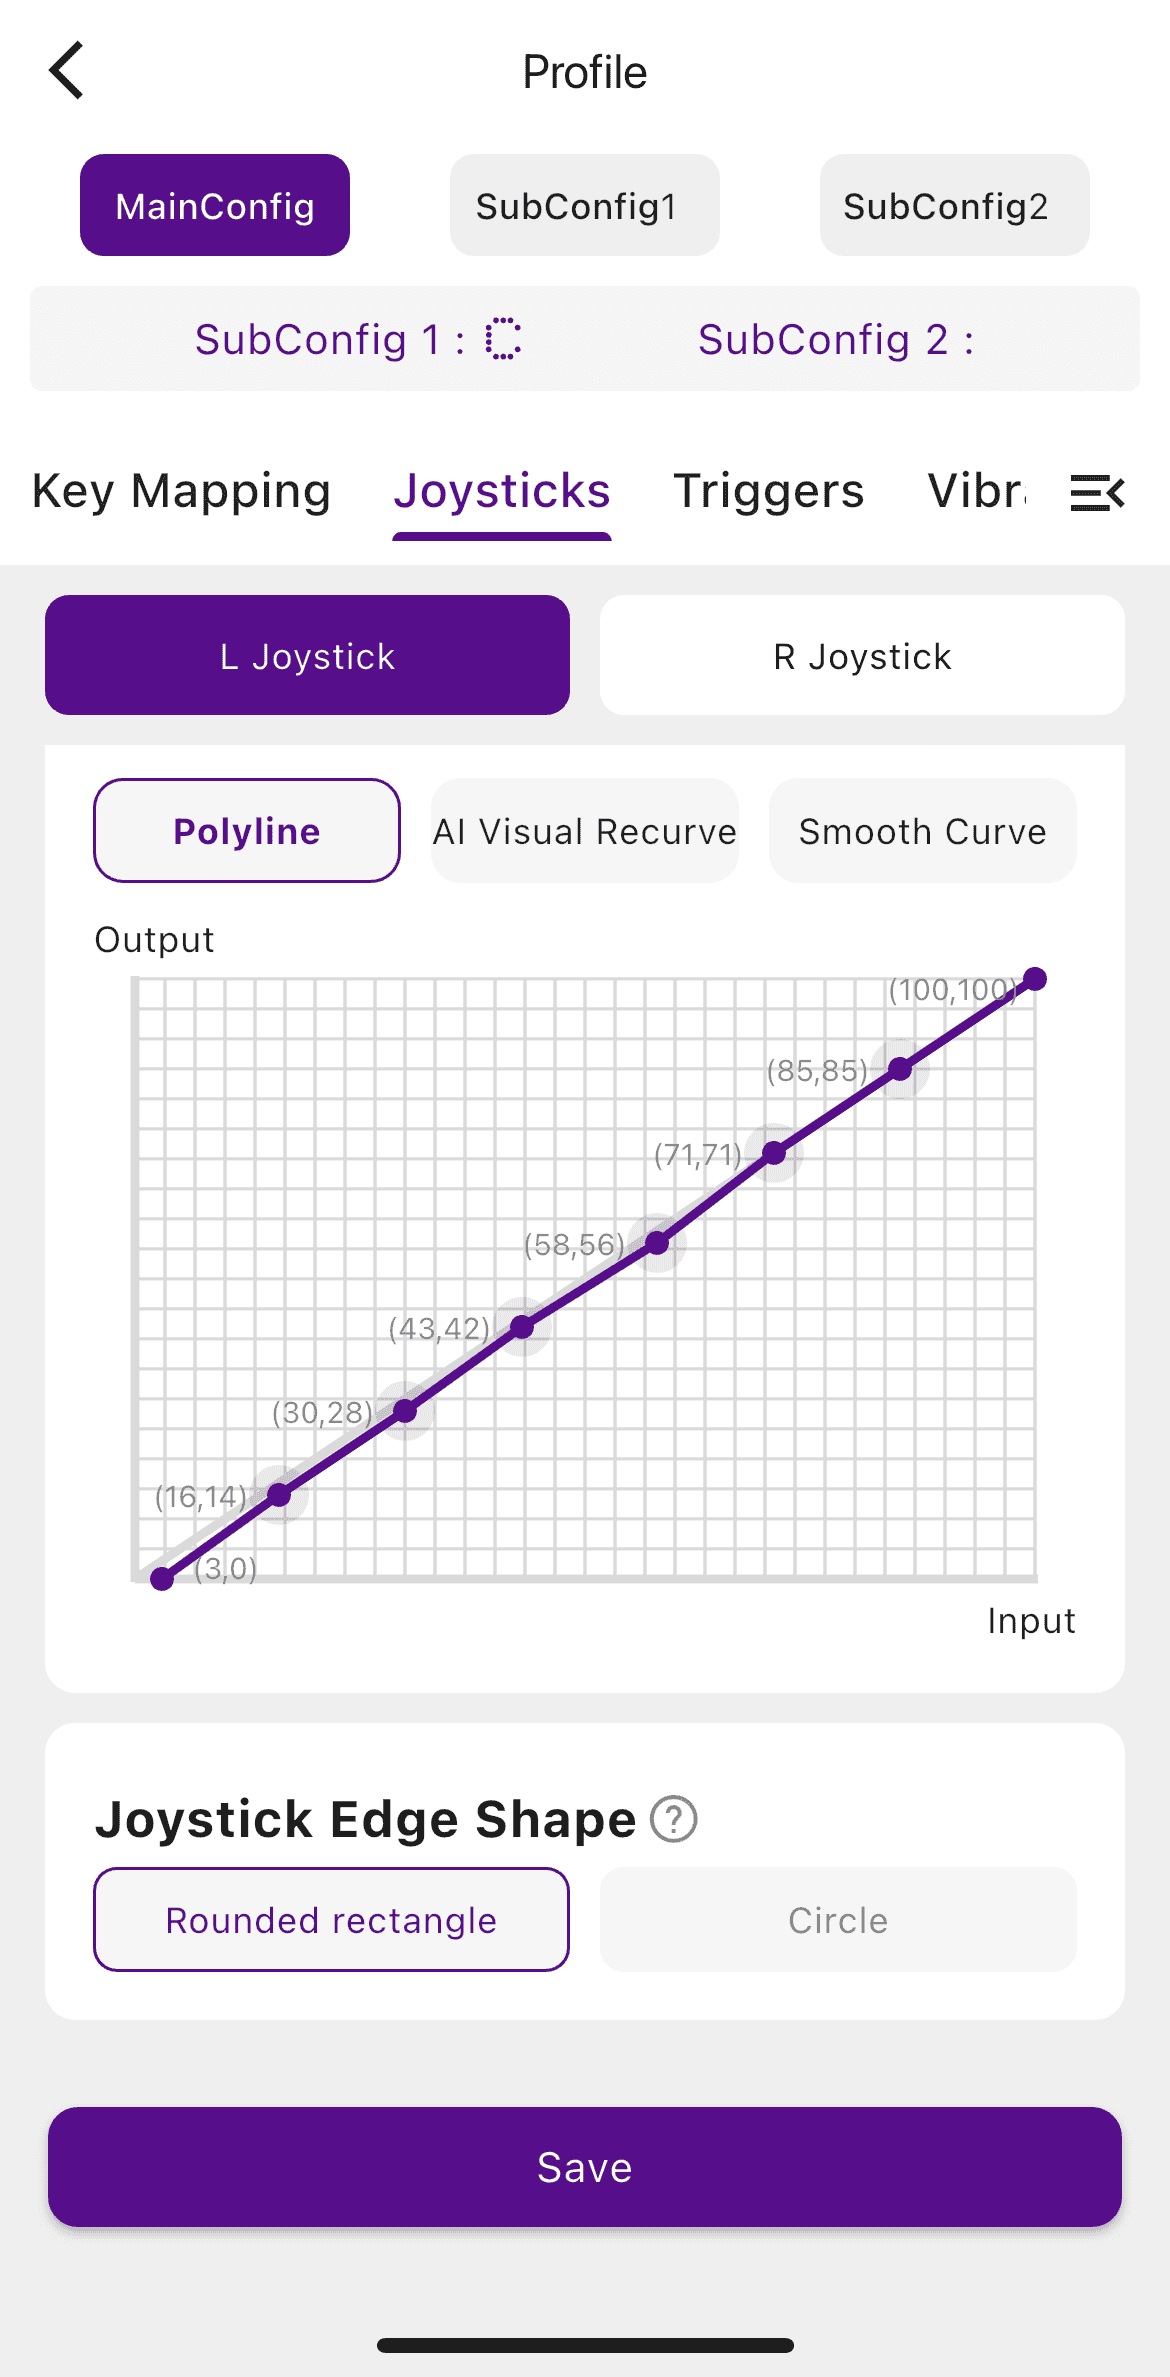
I have to say, this is one of the most advanced and customizable pieces of controller software I’ve come across. If I tried to break down every single feature in detail, it would easily turn into a separate article longer than the actual review. So instead, I’ll just walk through the main sections and highlight a few standout features, because some of them are genuinely impressive, and a couple of them are things I’m seeing for the very first time.
In the software, you can find:
- Connection mode selection
- Sticks resolution (8-12 bit)
- Report rate settings
- Indicator light brightness
- Dual connection function
- Calibration
- Firmware version
- Configuration repository
- Profile settings (3 onboard profiles available ant they can function as shift layers too)
- Button mapping (supports keyboard/mouse buttons and multi-input combos – up to 4 buttons pressed simultaneously)
- Turbo functionality
- Macro and macro repository (500-step macros are supported, which is incredible, honestly)
- Analog sticks settings
- Manual stick response curve setting supports 8-point adjustment
- Circle or square mode
- AI Visual Recurve function
- Mapping buttons (including keyboard and mouse) to stick movements
- Trigger settings
- Vibration parameters
- Gyro configuration (supports mapping up to 4 “extra buttons” to gyro movements)
- Magic Key settings
- Firmware update (only on PC software)
AI Visual Recurve is one of those unique features I mentioned earlier. It allows you to tune your stick response curve for a specific game using AI and your smartphone’s camera. In short, the process works like this: you launch the game you want to optimize your stick response curve for and point your phone’s camera at the screen. The software then automatically takes over stick control and performs a series of movements, analyzing through the camera how the game responds to them. Based on this data, it builds an optimized, more linear response curve tailored to that specific game.
In theory, this should allow you to get the same stick behavior across different games, regardless of how each one handles response curves. But in practice, it heavily depends on how steady you keep the camera during the process. Honestly, this is something you really need to try for yourself to see if it works for you or not.
The PC software also has another very interesting feature – a built-in AI assistant. Instead of manually searching through all the settings and adjusting everything yourself, you can simply ask it to do it for you. For example, you can say something like, “set the initial dead zone for each trigger to 10%,” and it will handle it automatically. By default, it was responding to me in Chinese, but I asked it to switch to English, and it politely switched. However, it still responded to me in Chinese from time to time.
Overall, I’m genuinely impressed with the software, especially considering it only launched recently. The only thing I can really complain about is that the PC version still has some untranslated sections. But given how recently it was released, I think this will be fixed in a future.
Accessories
The controller comes with a charging dock that supports a Smart Sleep/Wake-up function. It has a charge indicator – a row of LEDs that light up progressively while the controller is charging, so you can quickly get a rough idea of the current charge level.

I also appreciate how well the dock integrates with the controller’s design – the accent strip on the controller flows seamlessly into the strip on the dock, which makes the whole setup look like a single, cohesive piece.

There are some additional accessories available as optional purschase:
- R20 Wireless Dongle (used for connecting to Xbox consoles)
- Magic Cap Set (there are two different sets available)
- Branded controller carrying case
- Magic Key – motion control system
I think it’s worth talking about the Magic Key motion control system, because it’s definitely something fresh and it opens up a lot of interesting and fun use cases.
Essentially, the Magic Key is a bracelet with a detachable module that contains a 6-axis gyroscope. You can strap it onto your arm, knee, foot or even your head, depending on how you want to use it. Overall, it reminds me of a typical smart band in terms of its look.
Each Magic Key module supports up to six programmable “inputs”, which are triggered by specific motions. These inputs can be mapped to controller or keyboard buttons, combos, or even macros.
In the software there are also plenty of very flexible settings to play with – for example, you can configure specific motions, adjust sensitivity levels, and even set angle thresholds to fine‑tune how the module reacts. This lets you decide exactly which movement should trigger an input and how precise or forgiving the detection should be, giving you full control over the experience. This level of customization makes the Magic Key system adaptable to virtually any playstyle, whether you want subtle motion triggers or more dramatic, gesture‑based controls.
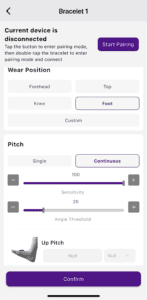
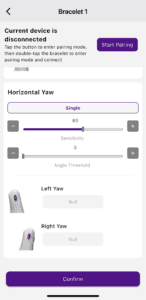
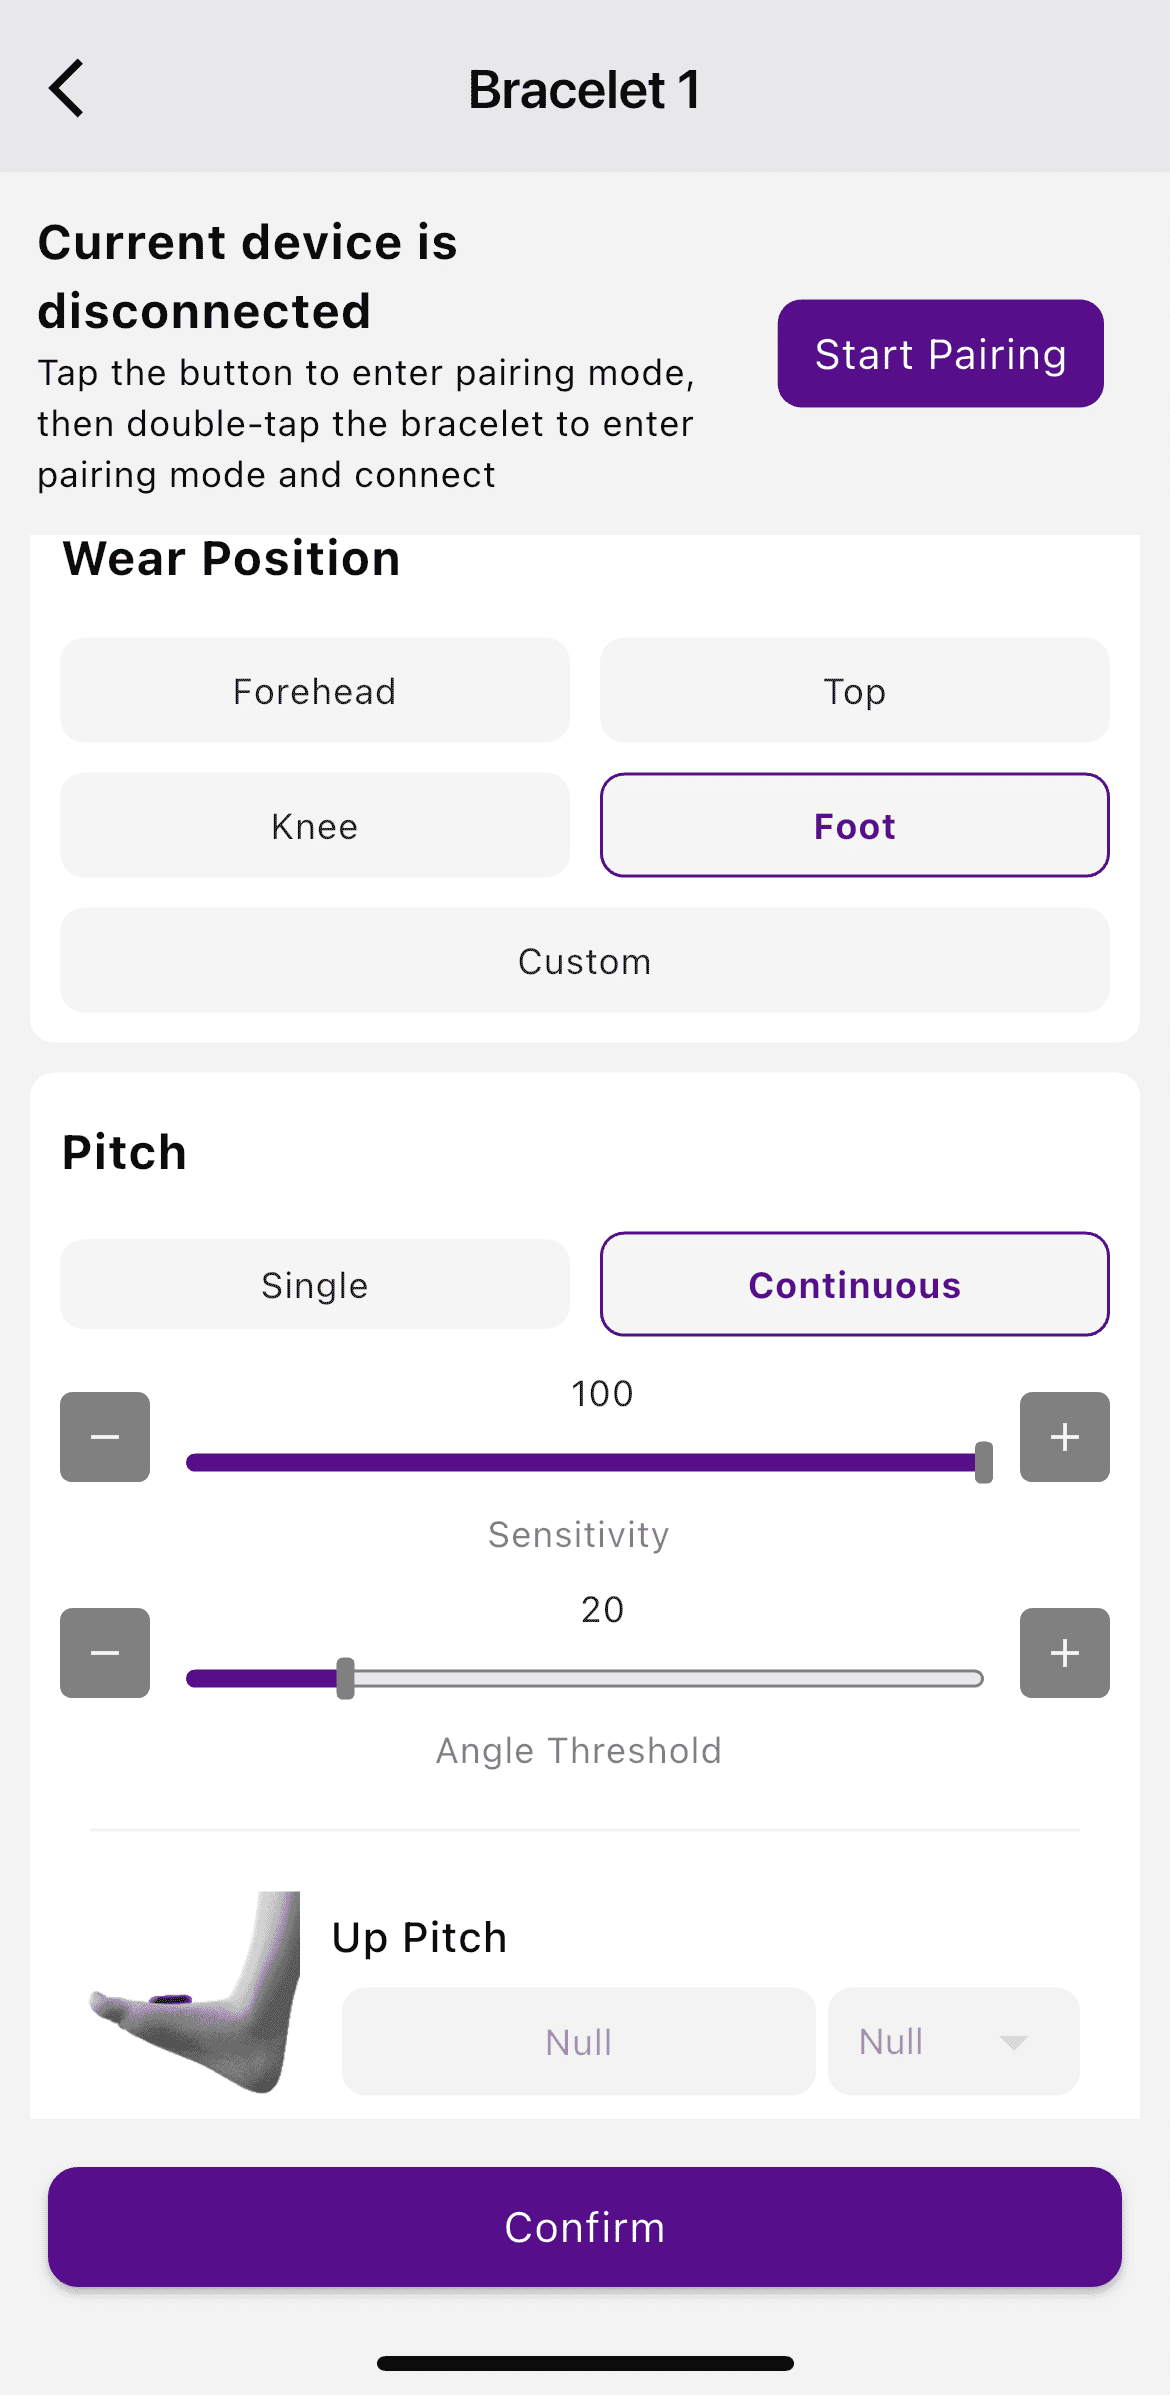
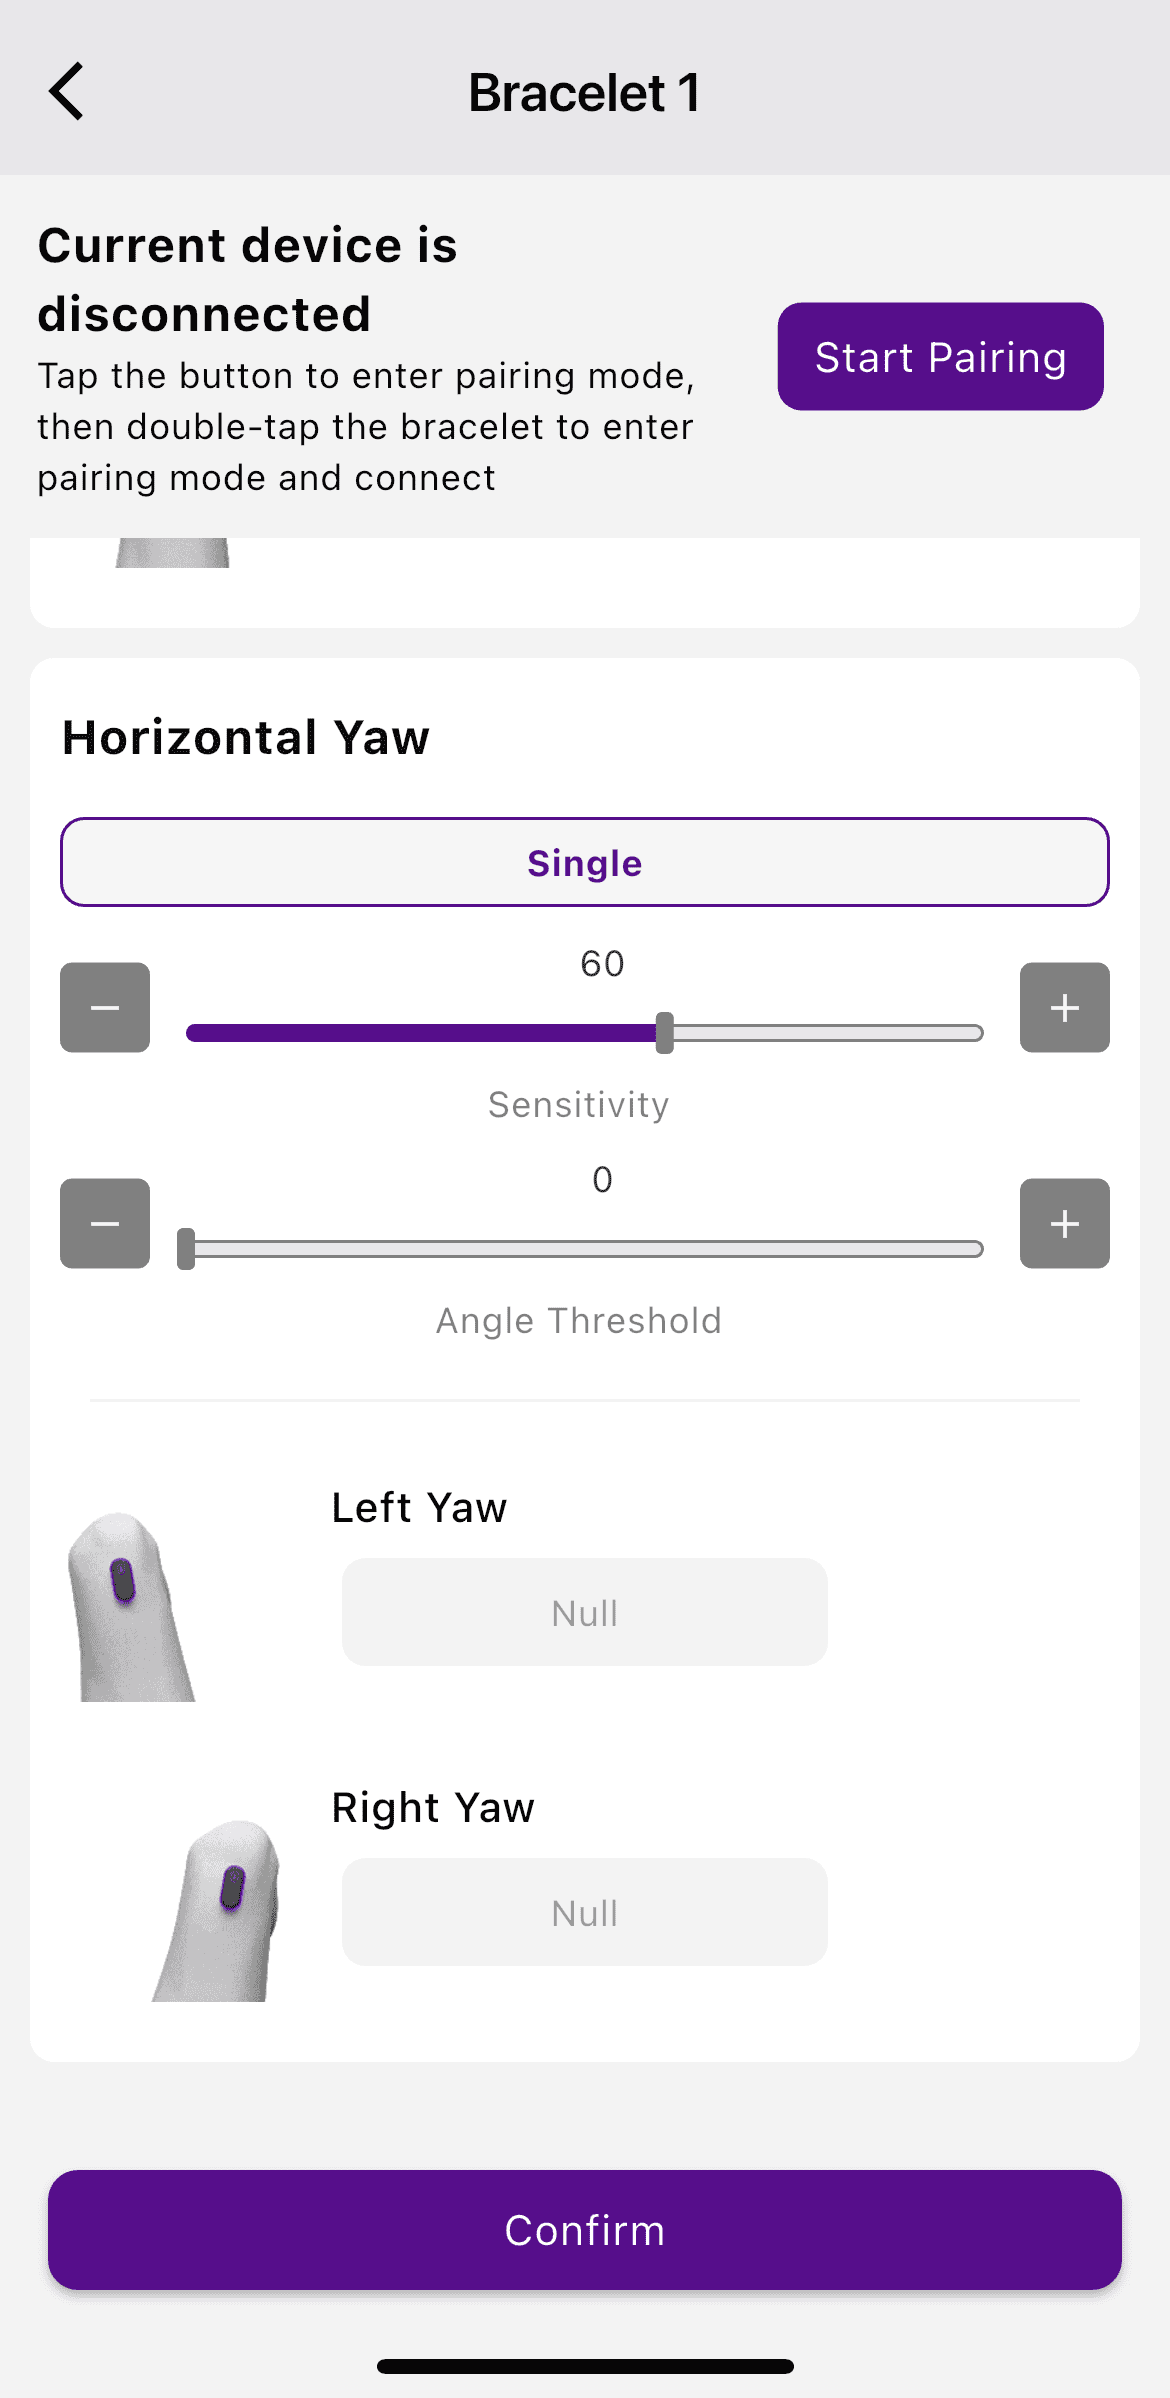
And the best part is that you can connect up to four of these Magic Key modules to the controller at once, giving you a lot of creative freedom in how you interact with your games. In total, that’s up to 24 extra “inputs” mapped to motions, which really expands the possibilities for unique control setups and playful experimentation. Ever dreamed of playing a fighting game where every kick you throw in real life lands in‑game? Now you actually can.
My Experience & Thoughts
I ended up being genuinely impressed with this controller. Considering this is Leadjoy’s first major release, this feels like a strong debut for the company. It doesn’t come across as a “first attempt” product at all – quite the opposite, actually.
The controller itself feels like a well-thought-out product. Even though it sits in the mid-range price category, it manages to deliver some features and hardware elements you’d normally expect from high or even top-tier devices. I’m talking about things like the JS13 Pro TMR sticks and the surprisingly advanced software. The latter, actually, really impressed me. I didn’t expect it to be this good at launch, but it offers a surprisingly wide range of customization options.
Yes, with the Xeno Plus you won’t find any flashy extras like RGB lighting, interchangeable faceplates, or fancy screens. It’s clear that Leadjoy was focused on getting the essentials right with this controller. And to be fair, those essentials are tuned extremely well. Everything that’s here feels refined and deliberate. It makes the Xeno Plus a very solid option in terms of price-to-value ratio. In my opinion, it’s one of the best controllers in the mid-range segment right now.
But I also want to point out that, to me, it really feels like this controller was designed with FPS games in mind. The triggers in microswitch mode are tuned really well and give a crisp, satisfying response. The top-tier sticks offer precise control that makes aiming smooth and reliable. On top of that, the software provides incredible options for customizing the sticks.
Pros and Cons
Good:
- Advanced software with a high level of customization
- Top-tier JS13 Pro sticks
- Well implemented microswitch trigger mode
- Back buttons have a nice grippy texture
- Thumbsticks with removable rubber caps
- Satisfying rumble feedback
Bad:
- Loud bottom-out in analog trigger mode
- Some parts of the PC software are not translated
Final Verdict
Xeno Plus is definitely a very strong mid-range controller. It doesn’t try to overwhelm you with gimmicks or unnecesary features, but instead focuses on getting the core experience right – and it does that really well. It even manages to step into the territory of much more expensive controllers thanks to a few standout features and hardware components, making the price-to-value ratio very solid. But where it really shines is in FPS games. If you’re looking for a controller for FPS that can deliver top-tier performance, but you’re not willing to overpay for features you don’t really need, the Xeno Plus is definitely worth recommending.

Controller and mechanical keyboard enthusiast. Tech reviewer, regularly sharing thoughts about gadgets and computer peripherals.


Just got this controller. Excellent comprehensive review. But how did you set up the C button to switch profiles? See nothing in mobile app or PC software to do this. Which software did you use and what version? I’m wondering if they took that option out. Latest version added d-pad diagonal lock as well as d-pad and L-stick swap along with 8 other things. Thanks for your time.
I used the mobile software, but as far as I remember, this is also available in the PC version.
When you open your controller settings, you should see three configs at the top of the screen: MainConfig, SubConfig1, and SubConfig2.
Select SubConfig1, for example, by clicking on it. Below, you should see an option labeled “Responsive…”. This setting determines which button activates this profile. Set it to the C button.
On the left side of that row, next to the button you assigned, there is a small arrow. Click it to expand the additional settings. There are two options:
1. Responsive — the profile remains active only while you hold the assigned button. In other words, it works like a shift layer.
2. Toggle — pressing the assigned button switches you to that profile, and it stays active until you switch away from it.
Thank you so much! The PC software calls it an Action Trigger not Responsive Key and it’s to the right of “Sub 1” not below, but after installing the mobile app I figured it out. I was creating a whole new profile instead of making my second profile button changes under Sub 1, and while it worked if I loaded it I could not figure out how you were switching between them. Once again, thanks so much for the fast reply. (Leadjoy support has yet to respond.) Appreciate it so much!
You’re welcome!
Glad I could help. Thanks for the update, and enjoy!